DIY - Embroidered Christmas Tree Card
- Orsucci Marion
- Dec 17, 2025
- 1 min read

We're entering the Christmas preparation period. And what could be better than beautiful handmade cards?
This simple and poetic DIY project , designed for children aged 4-8, allows them to play with letters and develop fine motor skills, but it's also great fun for older children.
Materials :
Cardboard sheet (green and white)
Ruler
Pencil
Round-tipped needle
Embroidery thread (gold here)
Beads (coloured and lettered)
Glue
Masking tape
Star stickers
Step-by-step :
On a green sheet of paper (16 x 13 cm), place the markings to make your holes.
The tree here measures 10 cm high: center the first hole, then draw a horizontal line 1 cm lower (2 cm long, i.e. 1 cm on each side).
At each centimeter, enlarge the horizontal line by 0.5 cm to form the patter of the christmas tree.
Form holes at the markings with a needle.
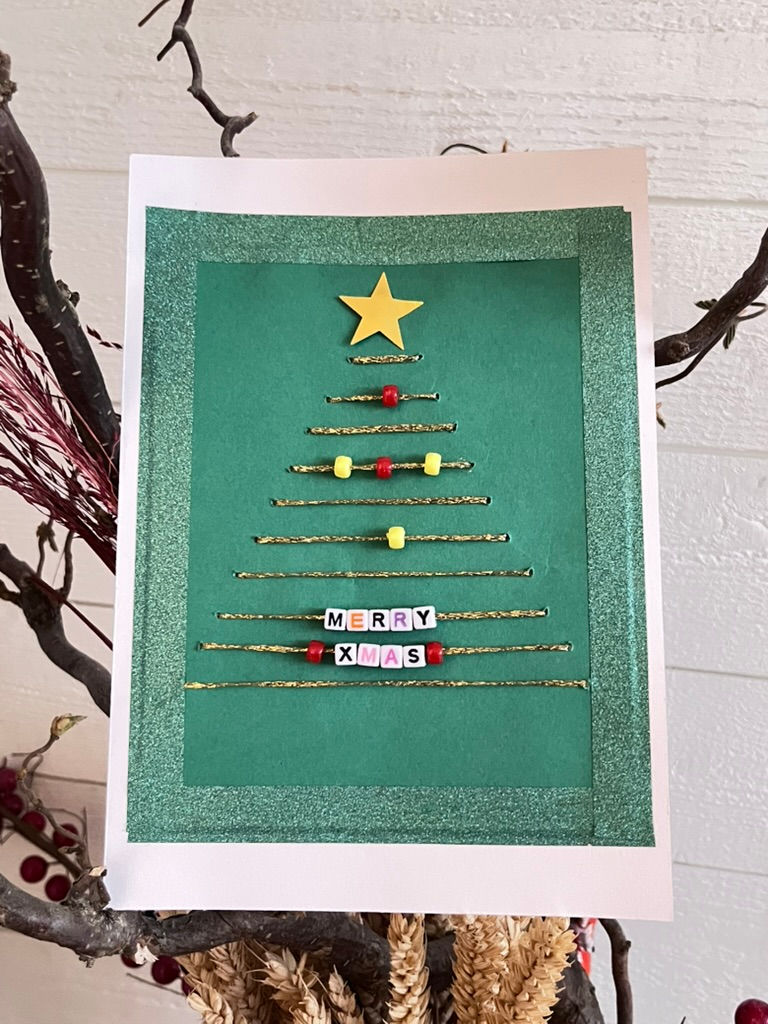
Embroider by passing the thread from one hole to the other. Secure it to the back with a small piece of tape and glue a star to the top (visible side). Thread a few beads onto the thread to decorate your tree.
(Pay attention to the direction of the letters if you are forming a word!)
For the finishing touch, glue the green paper onto a white A5 sheet, then mask the outline with masking tape for a clean and more festive look.


Two different versions (mine, and my 7-year-old son's)


Comments