DIY – A wooden beads snowman
- Orsucci Marion
- Jan 10
- 2 min read


The wait for snow is a bit too long this year for my little Swedes…
So, to bring a little winter magic home, we created our own indoor snowman !
A soft little man, who won't melt in the sun, and who will bring a warm touch to the winter decoration.
Materials
Step-by-step
1. Prepare the wooden beads
Start by painting the beads with a layer of gesso, then one or two layers of white paint.


Allow to dry completely before proceeding to the next step.
On one of the beads, using Posca markers, draw two black eyes and a pretty orange carrot for the nose. You can also add a little smile if you want to give it a mischievous look.


2. Assemble the body of the snowman
Glue the three beads together by stacking them on top of each other, using hot glue, making sure to align them properly.


And there you have your little round snowman!
Next, glue two small twigs to the sides to form the arms.


Make the wool hat.
He's a bit cold at the moment, so why not make him a nice hat?
Cut a strip about 1 cm high from your toilet paper roll or thin cardboard. Then create a circle with a diameter slightly larger than the bead (your snowman's head).
It needs to be a few mm wider because there will be the thickness of the wool in addition to the cardboard.


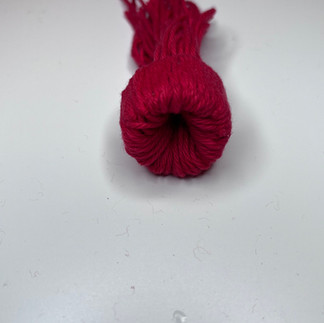
Next, cut several pieces of wool yarn approximately 15 cm long.
Loop each thread around the cardboard ring until it is completely covered.


Tie all the yarn ends together at the top, then thread them through the inside of the circle to secure them in place and form a pom-pom. Finally, cut the yarn ends of the pom-pom to make it look cleaner.


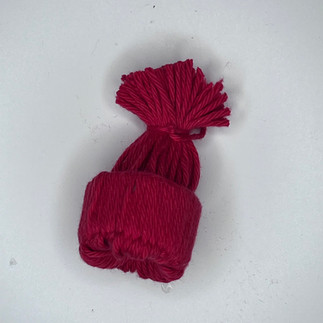
And here's a nice warm little hat to place or stick on the snowman.
☃️ And there you have it!
Your snowman is ready to take a place of honour on a table, shelf or in a playroom.
A simple, poetic and charming DIY project to do with children to help pass the time until the real snow arrives.


Comments